3D reconstruction of Niobide Chiaramonti
Guest post by Barbara Nagy, student at the Hungarian University of Fine Arts as a wood-sculptor conservator.
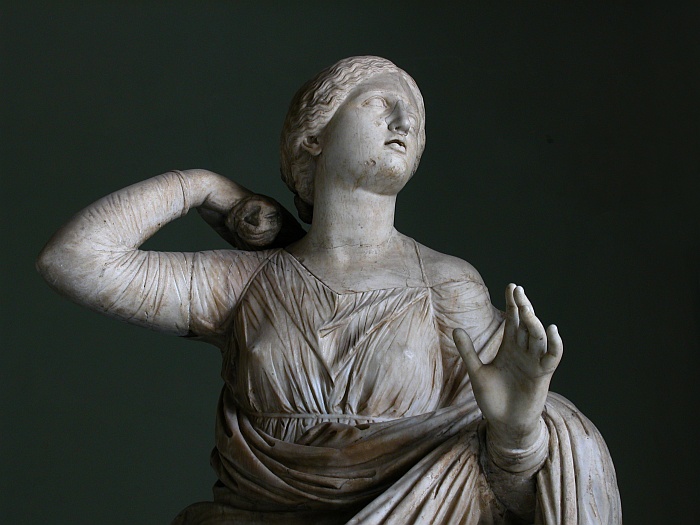
At the Hungarian University of Fine Arts, a new course, the 3D Technologies in Sculpture Conservation was launched in the 2024-25 academic year. In this course, students practiced 3D additions and reconstructions on artworks, as part of their conservation project throughout the year. My project was to complete and reconstruct a piece of art that I found online, since as a second-year student I didn’t have any physical objects to restore. When I selected the sculpture, I made sure that the 3D model was downloadable from an online platform and contained enough polygons to ensure adequate quality and shapes. For me, the quality of 3D models available on SMK Open, the digital platform of the Statens Museum for Kunst (National Gallery of Denmark) seemed the best, so I’ve chosen a sculpture from this site. My choice was the Niobida Chiaramonti, which has many missing parts, like the arms and parts of its drapery.
The project began with researching the sculpture’s history and looking for reference photos of other Niobida sculptures. Based on this information, sketches were made to plan the reconstruction. The 3D models of the additions were created in Zbrush according to these plans. To present the reconstructed model, pictures and an animation were rendered in Blender. Another way of the presentation was a 3D printed version of the reconstructed model. The original 3D scanned sculpture and the additions were printed using different resins, so that the parts would be distinguishable. The additions were printed with a transparent, while the sculpture was printed with a grey colored resin. The printing was carried out by the Digital Form Creation Laboratory within the Department of Artistic Anatomy, Drawing and Geometry of the university.
My conclusion from the project is that this technology is a great way to reconstruct fragmented sculptures without causing any damage. It provides new opportunities for conservators to create additions (or color reconstruction), offering several possibilities for both physical and digital presentation.
The process of creating the additions
The 3D additions were made in Zbrush. These elements were not directly reconstructed on the base model; instead, each addition was created by using separate forms. The recunstruction process began with the statue’s left hand. First of all, a spherical shape was inserted, which was scaled down, elongated, and positioned in place of the palm. This form was selectively masked, leaving an oval opening at the wrist, to prevent any deformation in that area during further sculpting. Using the Gizmo tool, the shape of the wrist was extruded, and the same method was used to model the fingers (see Figure 1).
The stretching process caused polygon distortion and surface noise. In order to continue the sculpting, Dynamesh was applied. This retopology helps to get a new, cleaner surface, with uniform polygons. Then the mass of the hand was sculpted by using a variety of brushes and the direction of each fingers were adjusted segment by segment.
To enable the sculpting of finer details (such as fingernails and sharp creases) additional Subdivision levels were used (see Figure 2). Finally, the model was duplicated and processed with ZRemesher to generate a cleaner topology, which followed the model’s shape better. For the right arm, the previously completed left hand was duplicated and mirrored to ensure the same scale and form. Due to the fact, that the entire forearm was missing, it was constructed separately. After that the hand was positioned into the planned pose and then it was merged with the forearm.
Following the reconstruction of the hands, the remaining missing parts (including the right little toe and some broken sections of the drapery) were similarly reconstructed one by one.
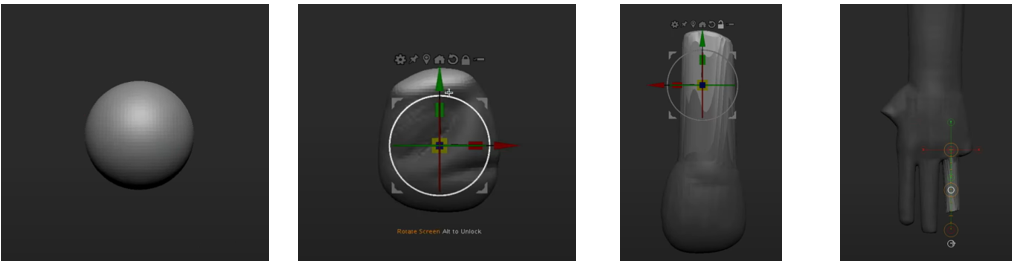 Figure 1 - Steps of sculpting hand (Source:
 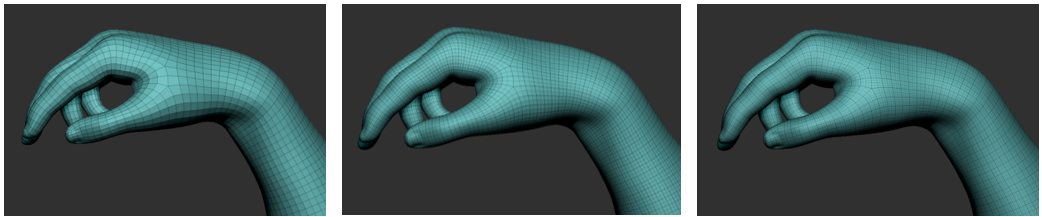 Figure 2 – Subdivision levels, increasing details of the model
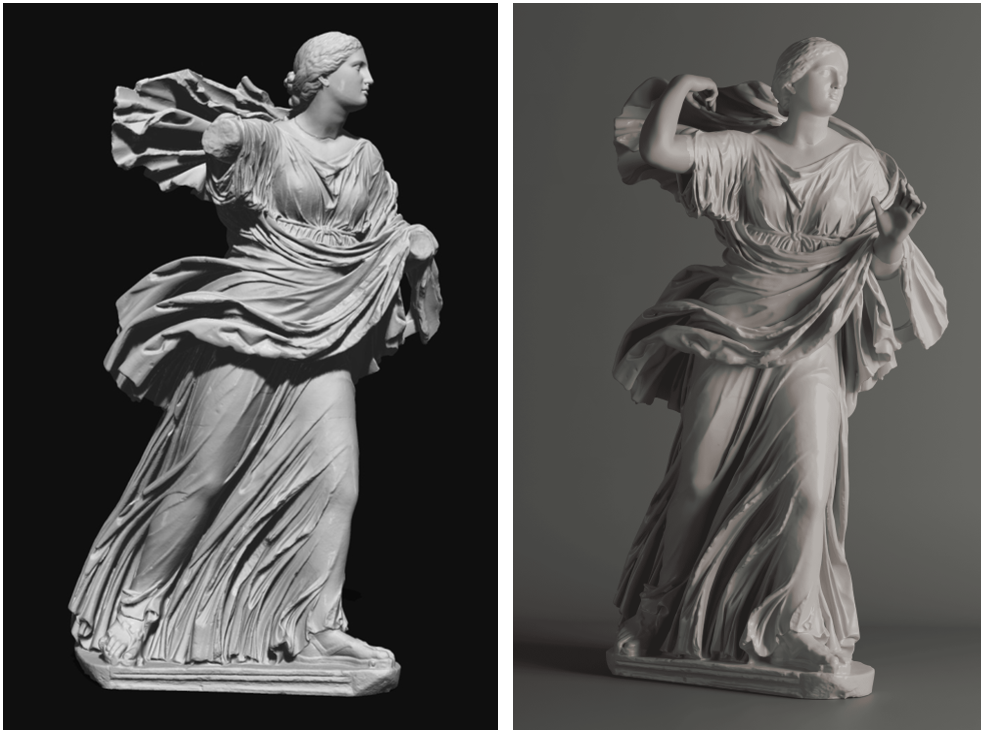 Figure 3 – The 3D model before and after the reconstruction